When a door starts showing signs of visible damage and wear, it’s time to replace it. Visible damage can affect your home’s curb appeal and make it difficult to open or close.
Door Replacement can be a project you tackle on your own or with the help of a professional. Regardless of the type of installation, there are several steps involved in Door Replacement.
Performing a door inspection is an important part of home maintenance and can save you a lot of money and headaches. This is especially true if you are considering selling your home, as damaged or poorly working doors can significantly lower the market value and turn off potential buyers.
Start by assessing the overall condition of your door(s) and frame opening. Make sure the gap between the frame and threshold is consistent and not too large or too small and that there are no signs of water damage or wood decay around the frames and sills. If you do find problems that cannot be fixed by replacing a hinge or threshold, it may be necessary to replace the door.
Next, if you are using the same frame and hinges as the original installation, it is crucial to accurately measure the existing frame opening and door dimensions. This will ensure the hardware preparations in the new replacement door match the dimensions of the existing frame opening and door to provide correct positioning and clearances for operation.
If your gap between the door and frame is uneven, place a support or wooden wedge under the door to relieve tension. Then, remove the hinge screws from the door and measure the thickness of the frame at all hinge locations. Record these measurements. If the gaps are too large, use shims to recess the hinge leaf further into the door. (For more information on adjusting hinge reinforcements, consult the SDI manual on door installation or contact the hardware manufacturer.)
Moulded, real wood veneer and hardboard hollowcore doors should have 2 hinges. Feature and primed doors should have 3 hinges. Identify the locations of the old hinges in the frame and mark where the new ones will sit on the door with a pencil. If the existing hinges are not flush with the frame edge, mark the location of the hinge knuckle in the frame and chisel away the extra hinge material to allow for proper clearance.
Selecting the Right Door
Door replacement isn’t just about improving the aesthetics of a room — it can also help reduce energy costs. Newer doors are more effective at blocking drafts and insulating the space. They’re also often easier to open and close, making them a better choice for busy homes. And while it may seem intimidating, installing a new door is actually a project well within the capabilities of most do-it-yourselfers.
The first step is selecting the right door for the job. Use the existing door as a template, if possible, to make sure the new one will be a proper fit. Start by marking the locations of the hinge mortises on the old door with a pencil. (Mortises are the carved or routed-out depressions that accept the hinge blades and leave them flush with the surface of the door.) Then, place the new door in the opening and wedge it 1/8″ from the bottom to ensure a proper fit.
Next, remove the hinge leaves from the door and frame. Most doors are hung on loose-pin hinges, which means that half of the hinge is attached to the door and the other to the frame. To release the pins, simply pull the hinges apart at the top and bottom of the frame.
Shim the hinge and latch jambs to level the surfaces, if necessary. A framing square or a builder’s level should be able to tell whether the jamb faces are flat against the wall surface. If they’re not, hammer wood shims to fill the gap. Aim for a 1/8″ clearance at the bottom, and about 1/16″ at the top and sides.
If you plan to install a strike plate and lock set, shim the head jamb as well, if needed. Then, nail through the shims with 8d finish nails to hold the two jambs together. Be careful not to drive the nails through the trim and into the stud wall, as this can weaken the framing. And don’t forget to shim the bottom of the jamb where it meets the floor. This will help prevent squeaking when the door opens and closes.
Preparing the Installation Site
Door replacement can be an intimidating project for homeowners, especially those without prior experience. However, it is actually a fairly simple and straightforward project that can yield significant benefits for the homeowner. These may include increased security, improved energy efficiency, and a fresh new look that revitalizes the overall feel of the home.
Before starting the actual replacement process, it’s important to make sure that all materials and tools are ready to go. This will save time and money in the long run, and it will also ensure that the work is performed correctly the first time around. Before the start of the project, it’s also a good idea to conduct a thorough assessment and inspection. This can help to identify any potential issues before they become a problem, such as rot or damage.
Once the doors have been ordered and are scheduled for delivery, it’s a good idea to take a few steps to prepare the installation site. This can include putting down tarps on the interior and exterior of the house, removing trim or molding around the opening, and cleaning up any debris that’s lying around. It’s also a good idea to remove any hinges or screws that are attached to the existing frame. Hinges made of metal can rust with enough exposure to moisture, and they can also be damaged during forced-entry burglaries or if a dog accidentally runs into them.
When installing the new door, it’s important to leave a small gap at the bottom of the door for flooring and to make sure that the door is level with the top and sides. This will help to prevent water leaks and air infiltration, as well as allowing for proper insulation.
Once the gap has been properly adjusted, it’s a good idea to hammer in shims at each location. These are thin pieces of wood that can be inserted in the space between the existing frames to provide support and help achieve a more accurate and even fit. Once the shims have been installed, the new door can be nailed into place.
Installing the Door
Unless you’re confident enough to tackle the door installation on your own, it’s usually best to leave this type of work to a professional. With a little guidance, though, you can have a beautiful new door installed in no time and a dose of smug satisfaction to boot!
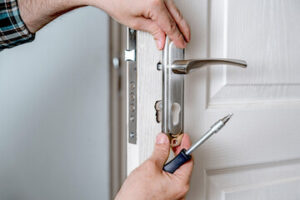
First, remove the hinge pins from the hinge knuckles. Place these with the other hardware in a container for safekeeping, as they can be reused later. After this, lift the door from the hinge knuckles. It’s important to use a level and a hammer to make sure the door is straight before securing it. A few small adjustments are often all that is needed. Next, install the doorknob and lock set using the manufacturer’s instructions. Then drill holes for the doorknob and lock set mortise. Finally, install the hinge knuckles and strike plate with screws (using 2.5-inch trim screws). It’s important to remember to place shims under each hinge location to ensure a level and plumb installation.
It’s also important to install the sill pan and weather strip as well, if you haven’t already done so. This will prevent air leaks and cold drafts.
Before installing the sill pan, place three beads of elastomeric caulk along the entire length of the jamb and slab, including the overlapping portion of the sill pan. Press firmly to seal the gap. Then, apply a liberal amount of silicone caulk around the outside edge where the trim meets the jamb and slab.
Once you’ve finished, it’s a good idea to test the operation of your door by closing and locking it. Make sure it opens and closes smoothly and that the locks engage properly. If you’re having trouble, you may need to repair or replace the hinges, knob, lock set, or doorknob.
Annual inspections are also a great way to keep your doors looking their best and functioning properly. Check for signs of wear and tear, like cracking or fading, and address these immediately to prevent further damage. And don’t forget to regularly wipe down the surfaces of your doors, especially doorknobs, which are among the dirtiest parts of any home and can harbor germs and bacteria.